
Showing posts with label Tutorial. Show all postsShowing posts with label Tutorial. Show all posts
Wednesday, March 06, 2013
methods of conserving water: a gardening season primer

I’ll never forget my first lesson in conserving water. I was at summer camp, and our head counselor stood in front of the group and explained how we could use less water when brushing our teeth by turning off the water when not using it. As an adult who has been doing this practice most my life, it seems so elementary as to require no explanation, but I remember feeling astonished at this news as a child. Oh, right, I don’t need to run the water when I’m not using it!
Read more »at8:52 PM4 comments: ![]()
![]() Email ThisBlogThis!Share to TwitterShare to FacebookShare to PinterestLabels:Canning,Challenge,Crunchy Mama,Frugality,Gardening,The Three Rs,Tutorial,Urban Homestead
Email ThisBlogThis!Share to TwitterShare to FacebookShare to PinterestLabels:Canning,Challenge,Crunchy Mama,Frugality,Gardening,The Three Rs,Tutorial,Urban Homestead
Friday, March 01, 2013
spring cleaning update to your kitchen: {guest post}
How are you doing on your New Year’s resolutions? I wised up this year and didn’t announce my resolutions, thereby (in theory) circumventing guilt when I did not fulfill them. However, being a person who seeks self-improvement, I did make some mental notes on areas of my life and home I’d like to tinker with this year. One area I highlighted for renovation is the kitchen. But despite loads of inspiration on my Pinterest boards, I am having trouble getting started. Cue those guilty feelings.
With the beginning of March comes thoughts of spring cleaning, so it feels like a good time to put aside the fear and guilt and get moving on some of those resolutions. Today I’m bringing in a guest with expertise in the field of home improvement, and she’s going to give us some frugal ideas for where to begin on updating your kitchen. Be sure to read to the bottom for Jillian’s bio. Take it away, Jillian!
***********
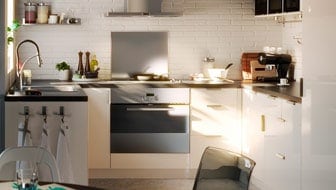
 |
| Image Credit: Ikea |
This year when you’re doing your annual spring cleaning, don’t just clear out the clutter from your kitchen; –make it better by improving the organization, updating the design, and maybe even doing a bit of renovation.
Here are several great ideas to make your kitchen the best room in the house.
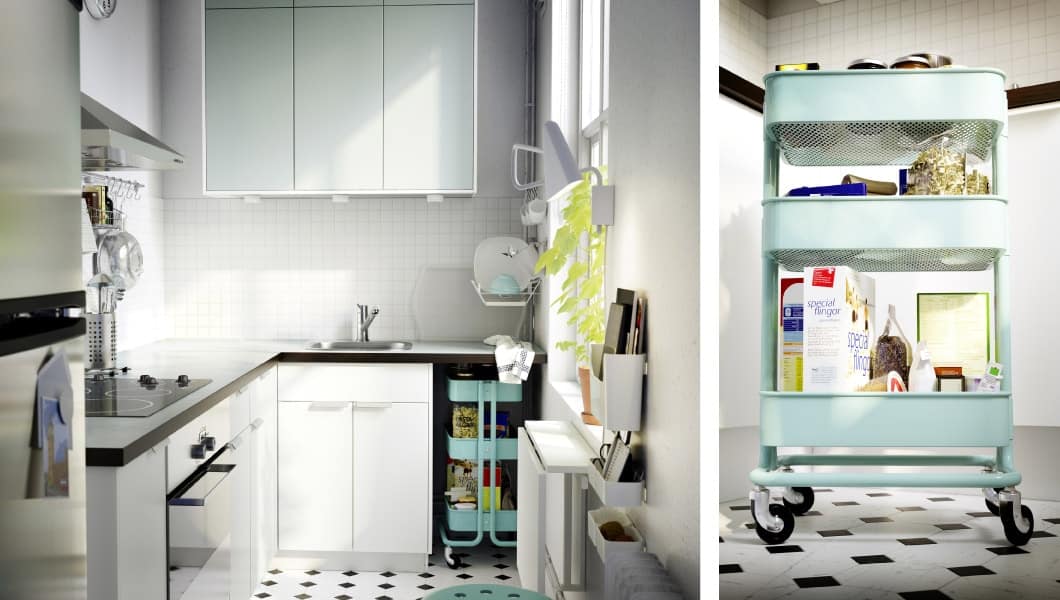
 |
| Image Credit: Ikea |
Organize(rs for) your drawers.
How many times have you cleaned out your drawers and made everything look fantastic, only to open them a few weeks later and discover that everything has gotten cluttered again? No system is perfect, but there are some great drawer organization systems that can go a long way towards helping. Ikea offers these simple drawer organizers that help you to divide your cabinets with clean lines, and several manufacturers are even applying this idea to dinnerware with pegged dish organizers. You can move the pegs around as you need to fit your particular plates, bowls, and saucers, and never worry about where they’re supposed to go.
 |
| My mom’s kitchen after recent updates (note the mirror and newly painted cabinets) |
Do it with mirrors.
Everyone knows that mirrors work wonders at making spaces feel bigger, but few people think to use this knowledge in their kitchen. If you have a cramped cooking area, you can make it appear larger by adding in a mirrored backsplash. You’ll open the space up with reflections and create a brighter, cleaner look.
Provide a facelift.
Redoing your entire kitchen can be prohibitively expensive, but that doesn’t mean that you can’t use frugal tips to make it look like a new room. Convince people that you replaced your cabinetry by getting new doors. Some places even offer them unfinished for as little as $9.95 per door! Alternatively, you could paint your current doors a different color and simply pick up some fancy new hardware.
 Sink and faucet.
Another piece of hardware that can make a big impact is your sink and faucet. Change out both, and you can have a truly different look in your kitchen, especially if you’re going from a traditional metal sink to one made of stone, china, or even glass. Of course, some sinks can cost in the thousands. For many, that’s probably too expensive, so if that’s you, make an impression with a new designer faucet. You can even help the environment by getting one that’s low-flow.
Hang around.
One great way to get organized and revitalize the look of your kitchen is to utilize the vertical space – especially the space underneath counters. If you’re really feeling in the mood to change things up, you can get a cabinet that suspends your microwave over the stove and free up more of the counter. Those looking for something a bit easier, though, may want to try a hanging pot rack or a hanging wine rack.
 |
| Image Credit: Ikea |
Change out your chairs.
If you have a small table in your kitchen or a breakfast bar, the kind of seating you use can make a big statement about the room. Are you stately and refined, or sleek and modern? Even changing out something seemingly small like your seating can greatly affect the overall look and feel of your kitchen. Perhaps just as important, smaller chairs can give you more space and make your kitchen feel bigger than it really is.
About the author: Jillian Watkinson is a DIY expert and has written about home and gardens for many years. You can find other examples of her writing on The Design Inspirationalist, The Kitchen Blog, and Pegasus Lighting. When she’s not writing, you can find her covering Community Home Supply and other useful supply companies for various projects.
Editor’s note: This post is part of LHITS DIY Linky and The Homestead Barn Hopat7:30 AM7 comments: ![]()
![]() Email ThisBlogThis!Share to TwitterShare to FacebookShare to PinterestLabels:Cleaning,Confession,Design,Frugality,Resolution,Tutorial
Email ThisBlogThis!Share to TwitterShare to FacebookShare to PinterestLabels:Cleaning,Confession,Design,Frugality,Resolution,Tutorial
Wednesday, February 13, 2013
on making our own lard
{Secondary/Alternate Title: Yes, We are Those People}
My plan was to publish a post today about pocket meat pies. That post will need to wait a day because to make a meat pie, you need a sturdy savory crust. I believe that crust should start with one surprising but important ingredient: lard. I’ve gotten on my lard soap box before, so rather than beat it to death, I’ll simplify the conversation today and boil it down–so to speak (hardy har)–to a few quick paragraphs.
Why lard?
In the middle of the last century, well-meaning scientists told us saturated-fat-containing ingredients like lard caused heart disease, and law-abiding citizens ran fleeing from it. Since then, we’ve learned that the replacements for lard–like vegetable shortening–contain trans fats, which are much worse for you than saturated fat. Not only that, but lard also contains monounsaturated fat that is necessary for brain function. Even leaving health out of the discussion for a moment, I am sold on the idea of lard because I am a firm believer in nose-to-tail cooking. Hence, we actually eat tail from time to time
In a nutshell, lard is not your enemy, and the people who want you to go on believing it is have ulterior motives. Set aside what you think you know, do your research, and make your own decision.
Where can you buy lard?
To make lard, you need to get your hands on pork kidney fat called leaf lard. The reason you want leaf lard is that you can render it into a neutral fat that doesn’t taste of pork, assuming you cooked it low and slow enough. I’ll get to that part in a minute. We get our leaf lard for a $1/pound from a cooler at our monthly meat CSA. If you don’t have a CSA, I bet you can strike up a deal with any pork seller at your local farmer’s market if you’re friendly. Heck, you might even be able to get it already rendered from your butcher if you’re lucky.
Remember how I said I was going to start saying yes to ideas, even if they sounded scary or impossible? Ahem. To be frank, the rendering process is not as pleasant as I’d like it to be. But then, with a process called “rendering fat,” did you expect it to be pleasant? For one thing, it’s messy, in that “fat gets on things and won’t come off things” way. For another thing, it doesn’t look good. Mine wasn’t even photographable. For a third thing, it’s smelly. Not “I’m frying up some bacon” good smelly, but “I’ve been working in the kitchen of a 24-hour diner” bad smelly. I advise you to make a giant batch in one day, then hang on to it in your freezer for the next six months. Let it be a warm enough day that you can crack a window–for us, that’s around 40 degF, but our standards are influenced by the chilly Beantown climate.
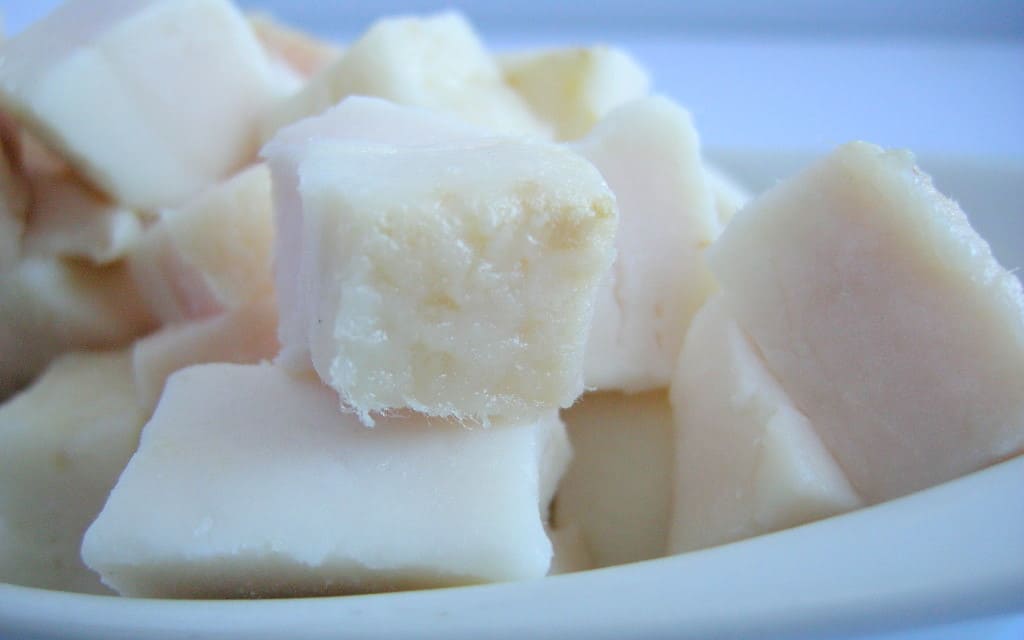 |
| Image credit: Nourished Kitchen |
How do you render lard?
Now that we’ve gotten the purchasing and caveats out of the way, let’s get down to cooking. The actual directions couldn’t be much simpler, so rather than reinvent the wheel I’m connecting to blogs that have already written them. If you are making a batch of savory lard and you don’t mind a slight porky flavor–in fact, you might even be going for that–you can make it in a Dutch oven on the stovetop. If you want it for sweet pie crust and don’t want it to taste like pork at all, then you should probably make it in a slow cooker. For either method, you’ll want to start by chopping the fat into small pieces (Note: if you’re getting it from the butcher, you can ask to have it ground, or you can do the grinding yourself if you have one of those sausage attachments on your stand mixer).
Here again are links to the two methods:
- Version A: Porky savory lard
- Version B: Sweet pastry lard
Tomorrow, we’ll delve into the fruits of our labor and discuss delectable meat pies. I promise it will all be worth the stinky effort.

Author’s Note: This post is part of Fight Back Friday Tasty Traditions Real Food Wednesday, Works for Me Wednesday, and Whole Foods Wednesdayat4:44 PM3 comments: ![]()
![]() Email ThisBlogThis!Share to TwitterShare to FacebookShare to PinterestLabels:Challenge,Chestnut Farms,Education,Frugality,Heirloom,Home ranging,Locavore,Real Food,Resolution,The Three Rs,Tutorial,Whackadoo
Email ThisBlogThis!Share to TwitterShare to FacebookShare to PinterestLabels:Challenge,Chestnut Farms,Education,Frugality,Heirloom,Home ranging,Locavore,Real Food,Resolution,The Three Rs,Tutorial,Whackadoo
Saturday, January 28, 2012
social media buttons: copy my code for your blog
 Today I am sharing how you can make social media buttons (Facebook, Twitter, etc. like you see on the upper right corner of my blog) appear on your blog. Before I could do that, I first had to figure out how to put html code in my blog without it being interpreted as code. Here’s where I went to figure that out.
Rather than tell you all the steps I went through to find these pieces of code and what I did to make sure they were in a line and spaced mostly equally, I am sharing the finished product. Be sure to replace my code (i.e. what you see highlighted in red.) with yours in the appropriate locations, or else you’ll be sending people to my pages. Not so bad for me, but not so good for you either.
Read more »at8:00 AM3 comments: ![]()
![]() Email ThisBlogThis!Share to TwitterShare to FacebookShare to PinterestLabels:Blogging,Tutorial
Email ThisBlogThis!Share to TwitterShare to FacebookShare to PinterestLabels:Blogging,Tutorial
Tuesday, January 24, 2012
tutorial: design your own blog buttons
A few days ago I would have never thought I’d be sharing my tips on designing anything using a computer. I’m not the most tech-savvy person. If I can do it, so can you! I’m even new to using the techie lingo; up to a few days ago I’d never even used the words banner, button, or badge in this context.
Read more »at10:56 AM19 comments: ![]()
![]() Email ThisBlogThis!Share to TwitterShare to FacebookShare to PinterestLabels:Blogging,Tutorial Older PostsHomeSubscribe to:Posts (Atom)
Email ThisBlogThis!Share to TwitterShare to FacebookShare to PinterestLabels:Blogging,Tutorial Older PostsHomeSubscribe to:Posts (Atom)
Share
“; n.innerHTML = at; container.insertBefore(n , footer); } } return true;};document.doAT(‘hentry’);![]()
![]()
![]()
<#comment></#comment><#comment></#comment>
<#comment></#comment>